
Creating Stunning Gradient Nails: A Step-by-Step Guide
Explore a step-by-step tutorial for creating stunning gradient nails using a sponge technique. Learn about the materials needed and see the results in both glossy and matte finishes.
Hello everyone!
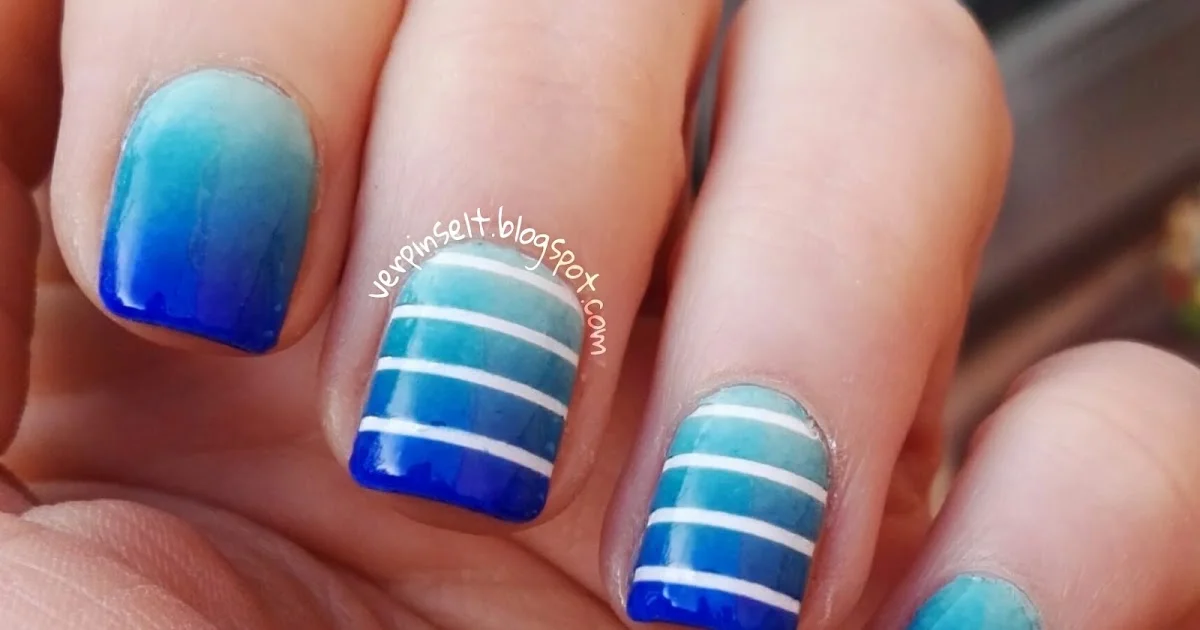
Before diving into my upcoming reviews of new nail polishes, I wanted to share my first experience with gradient nails. Some might call it ombré nails; honestly, I'm not quite sure! Regardless, I finally tried out the sponge technique that I had been wanting to explore for a while, and I'm excited to share a tutorial with you.
What You Will Need:
- A makeup sponge
- White nail polish
- Two to three nail polishes of your choice (I used "31 Electriiiiiic", "128 Let’s get lost", and "146 That’s what I mint" from Essence)
- Peel-off base coat or latex barrier
- Striping tape
Here’s How to Do It:
-
Start by applying a base coat of white nail polish and allow it to dry thoroughly.
-
Apply the peel-off base coat or latex barrier around your nail edges and let it dry.
-
Cut small pieces of striping tape and adhere them horizontally on two of your nails.
-
Apply the three chosen nail polishes onto the sponge, starting with the darkest color at the bottom and blending into the lightest at the top. Make sure the colors overlap slightly.
-
Dab the sponge onto all your nails to create the gradient effect. Layer the colors until they are vibrant and opaque.
-
Carefully remove the tape.
-
Peel off the latex barrier around your nails.
-
Finish with a top coat of your choice.
And voilà:

with a glossy top coat

And the matte version is just as lovely!
What do you think of my design for a first attempt? Do you prefer it glossy or matte?
Until next time,
Carry