
Connecting the Shelly Plus 2 PM to Two Lamps
Explore how to wire and set up the Shelly Plus 2 PM to control lamps and other devices in your smart home.
The concept of a smart home encompasses a wide range of technologies, but it often hinges on the smaller components in the IoT landscape. Shelly products have consistently demonstrated this over the years. These compact in-wall relays can control lights, roller shutter motors, garage doors, and much more. Even lights that are not inherently smart can be operated remotely. The devices are designed to be installed within the wall socket, making them nearly invisible.
Existing switches can still be utilized, allowing users to control devices via an app, Alexa, Google Home, or the physical switch itself. Importantly, using the switch does not cut power to the Shelly; instead, it simply triggers the corresponding relay in parallel.
Allterco Robotics has recently updated its Shelly line, with the new devices now featuring a “PLUS” designation.
I took a closer look at the “Shelly Plus 2 PM.” This device controls two lamps in our bathroom, and there are plans to also manage roller shutter motors with it in the future.
WARNING: Only qualified professionals should handle electrical work! The author of this article accepts no liability for any damages or injuries. All work is performed at your own risk and responsibility! If you are unsure, do not attempt any work on the electrical circuit!
01. Wiring
Only professionals should perform electrical work. If you lack the necessary expertise or tools, please contact a qualified service provider! Be sure to read the manual thoroughly and heed all safety warnings!
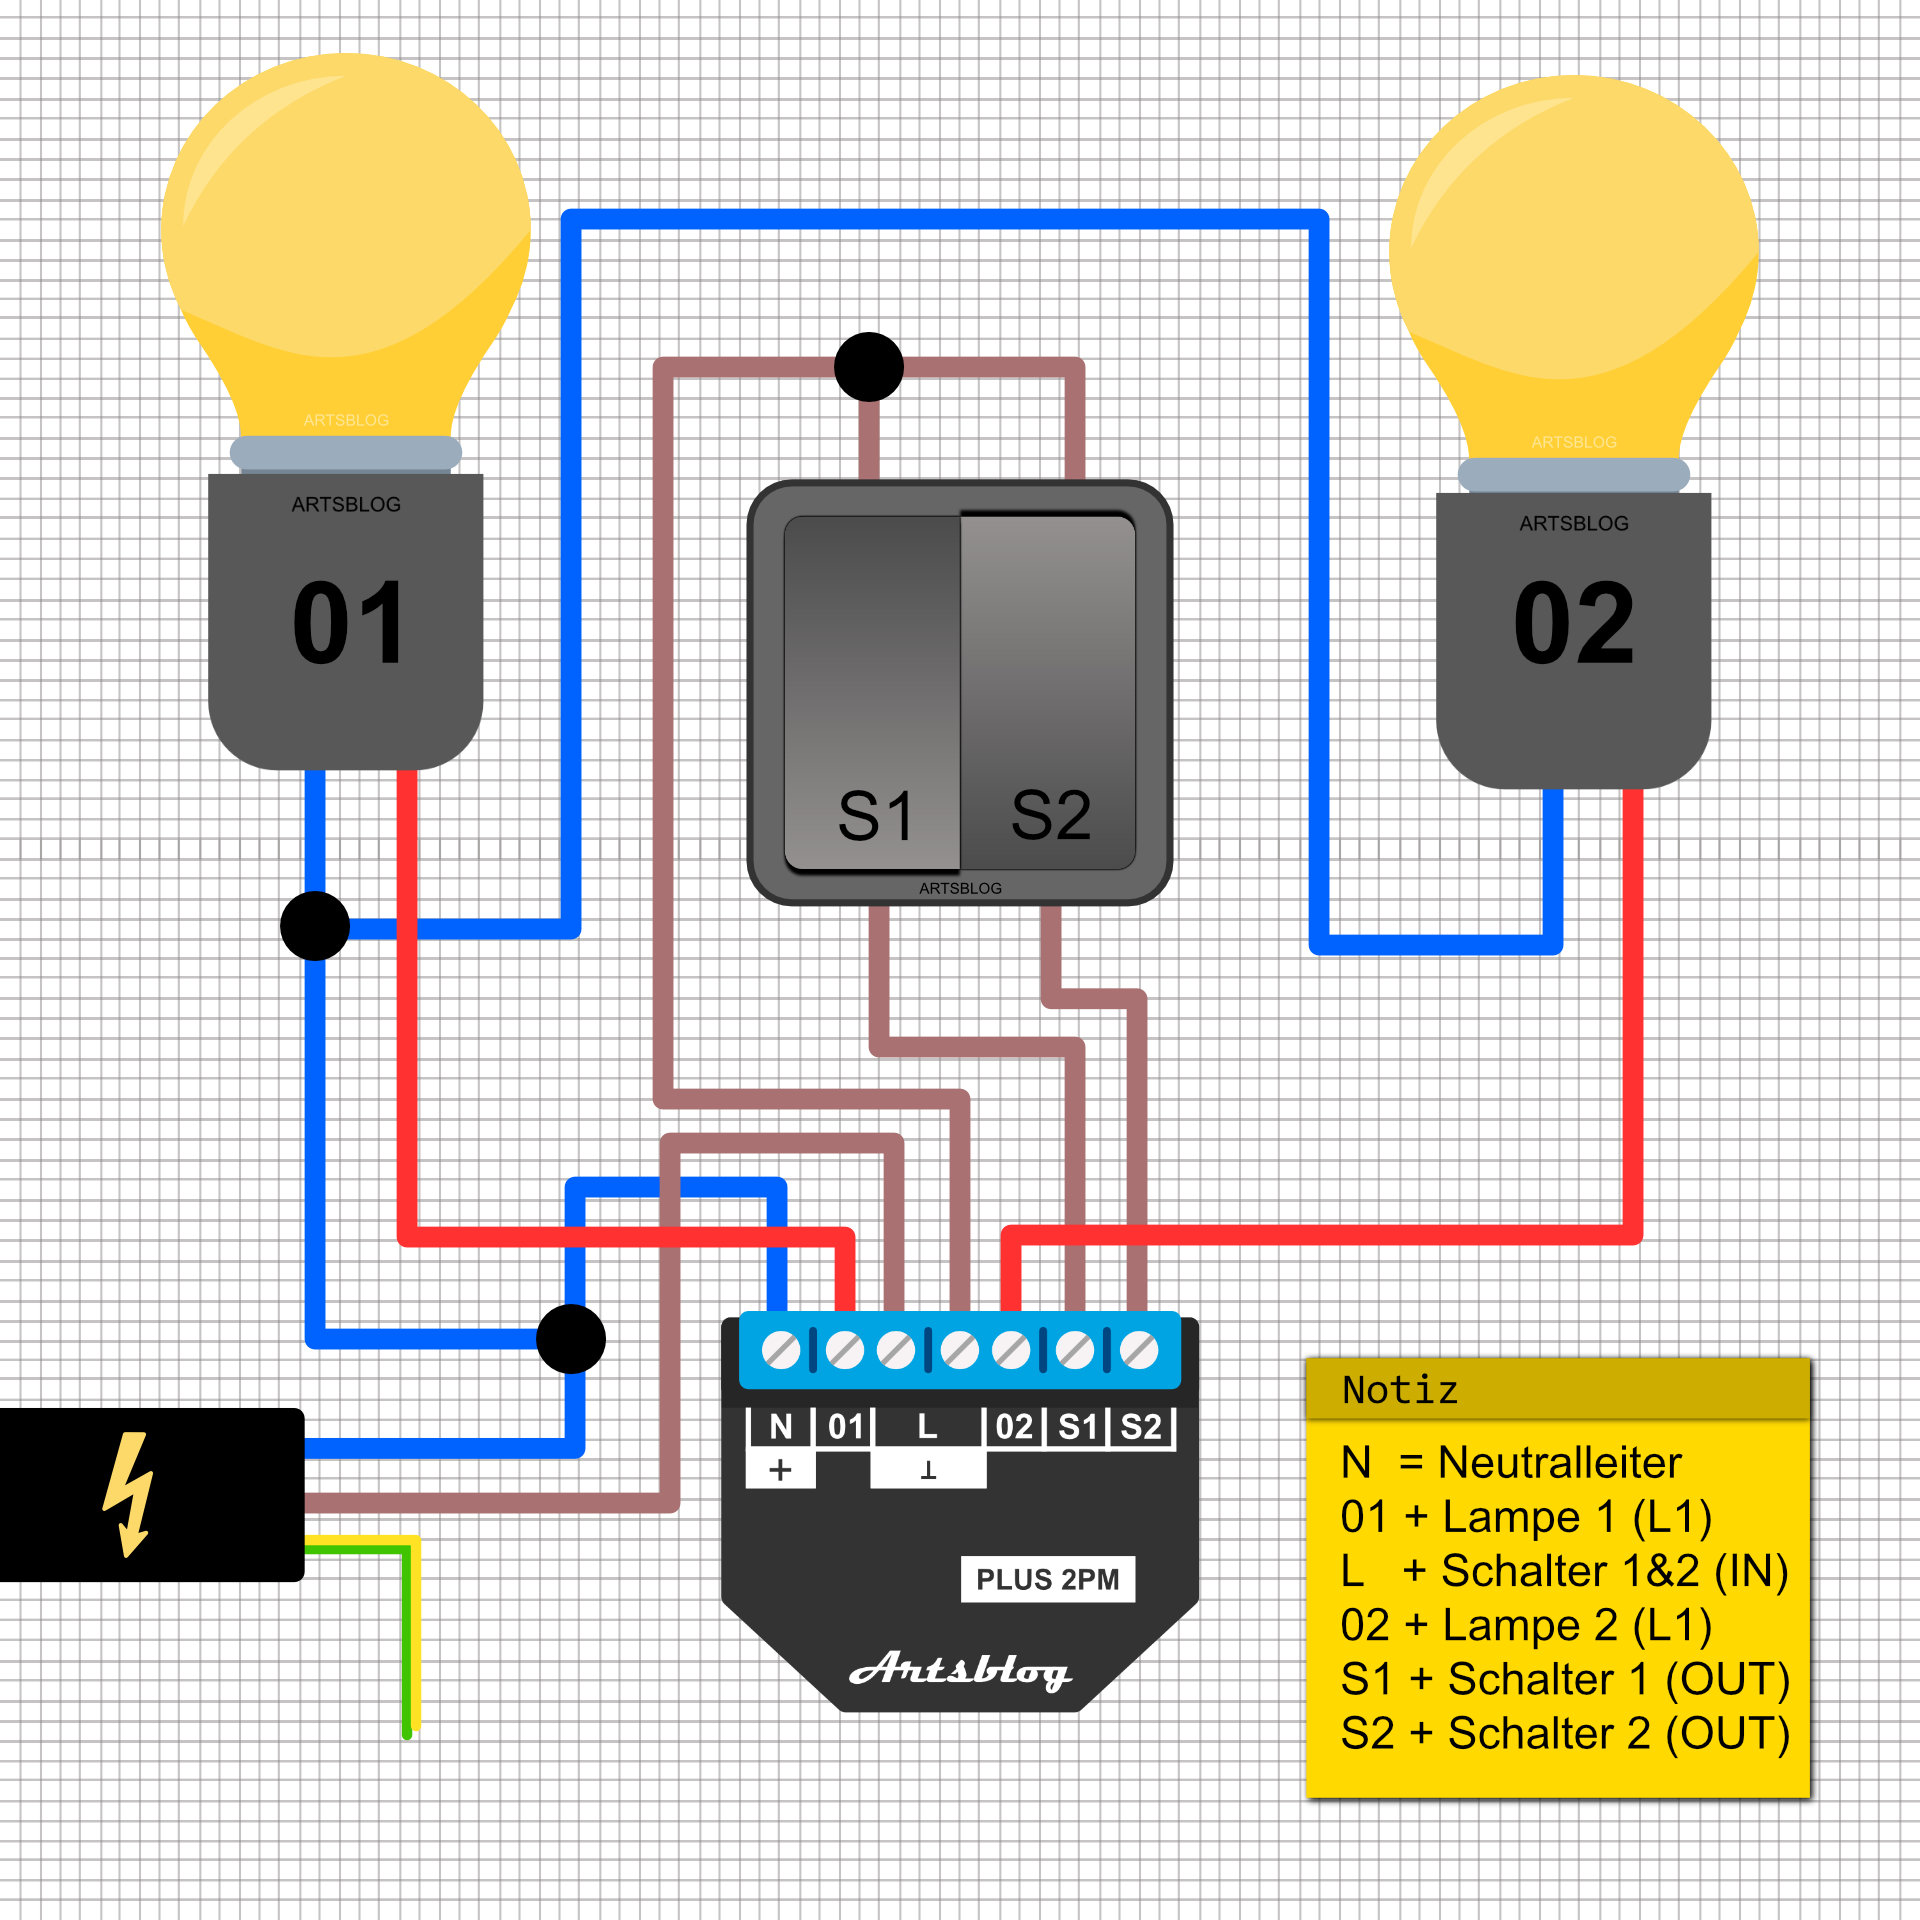
The image shows a “Shelly Plus 2 PM” connected to two switches and two lamps.
02. Setup
Once the Shelly is properly connected, it can be integrated into your home Wi-Fi network without the need for an app. Use your smartphone to search for Wi-Fi networks, and you will find one that starts with “Shelly-.” Connect to this new Wi-Fi and then enter the following IP address into your browser’s address bar: “http://192.168.33.1.” Through the web interface, you can now configure your regular Wi-Fi settings.