Concealer: 5 Common Mistakes That Ruin Your Makeup (and How to Avoid Them)
Concealer can transform your face's expression or ruin your makeup if not used correctly. Discover common mistakes and how to avoid them for a fresh, natural look.
- 0Shopping Cart
Last updated June 2, 2025, 11:28 PM
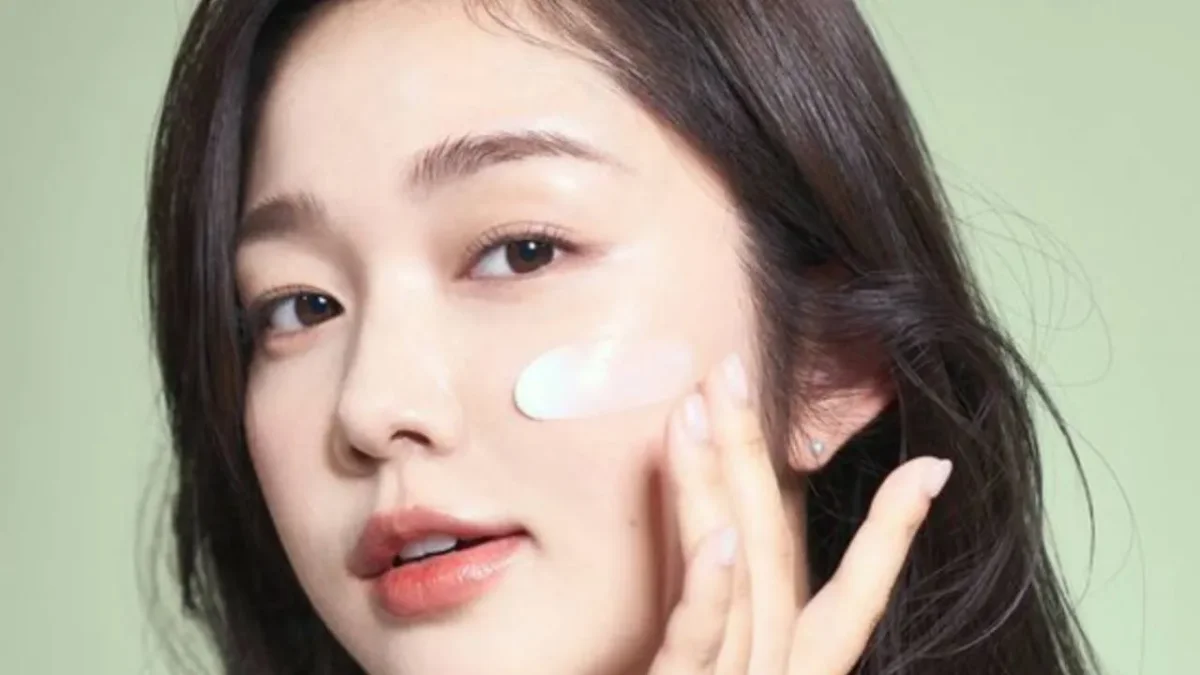
Concealer is one of those products that can completely change the expression of the face… or ruin a makeup look if not used correctly. Often, we apply it “as we were taught” or as we saw on social media, but each skin type, dark circle, and need is different. That’s why today I’m sharing the most common mistakes when using concealer and how to fix them to achieve a fresh, rested, and natural look.
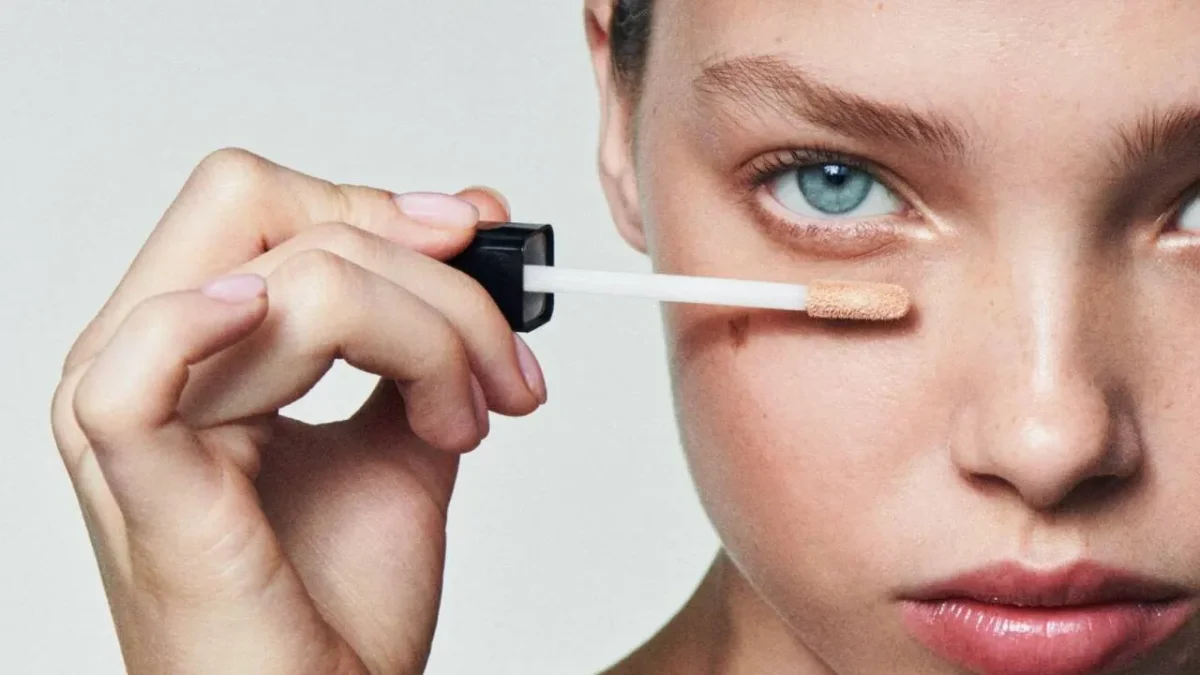
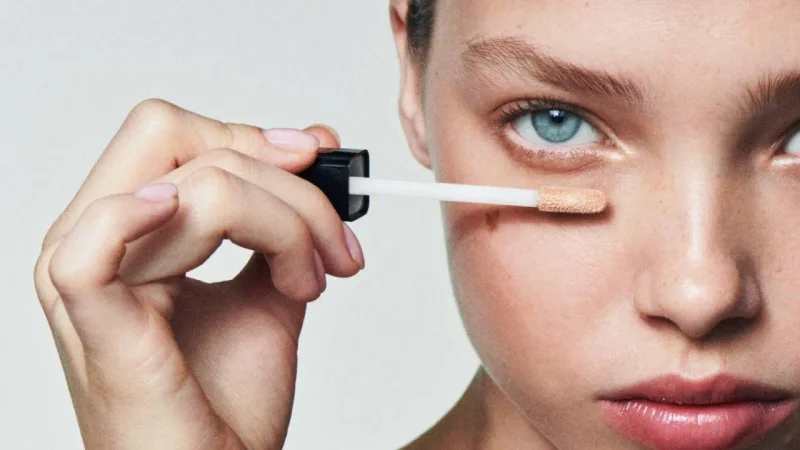
Mistake 1: Using a Shade That’s Too Light
It’s common to think that the lighter the concealer, the more it brightens. The problem is that if we apply a shade that’s too light directly on a dark circle, instead of concealing it, it leaves a grayish or even white undertone. And in photos with flash, it can stand out significantly.
How to fix it? Ideally, choose a concealer shade that is your skin tone or one shade lighter than your foundation at most. If your dark circle is very dark, don’t try to cover it with a light shade, but neutralize it first with a salmon, peach, or pink pre-corrector depending on your skin undertone and the color of the dark circle.
Mistake 2: Applying Too Much Product
Another frequent mistake is applying concealer from the inner corner to the temple, in a triangle or patch shape. This creates an unnecessary layer of product that can emphasize fine lines, crack, or make the skin look more rigid.
How to fix it? Less is more. Apply concealer only in the areas where the dark circle is visible or where there is shadow (usually the inner corner and a bit on the outer part of the eye). Blend it with gentle taps, using a damp sponge or a small brush.
Skin and Nail Care
Cosmetics and Beauty Professionals
Foundations
Makeup and Cosmetics
Facial Makeup
Professional and Continuing Education
foundation
If you need more coverage, wait for the first layer to set and apply a light second layer on top.
Mistake 3: Not Moisturizing the Under-Eye Area Well Before Concealer
The skin around the eyes is thinner and more delicate than the rest of the face. If it is dry, dehydrated, or not prepped, any product we put on top will only emphasize lines and can cause the makeup to crack.
How to fix it? Before applying concealer, use a light yet hydrating eye cream. Avoid very heavy or oily textures if you’re going to apply makeup right after.
Apply with your fingertip in gentle taps and let it absorb well for at least 1 to 2 minutes before continuing with your makeup.
Mistake 4: Not Setting the Concealer (or Setting It Too Much)
If you don’t set the concealer with anything, it’s very likely to move and settle into the natural creases of the eye. But if you use too much powder (especially if it’s thick or not suitable for your skin type), the area can become dry, marked, and appear dull or rigid.
How to fix it? Set the concealer with a minimal amount of very fine and silky loose powder, preferably translucent or with a luminous finish if you have dry skin.
Use a small brush, a soft puff, or even the tip of the sponge. Apply with gentle taps, without dragging, only in the areas where there are actual creases or where the concealer might move.
Mistake 5: Not Adapting the Concealer to Your Skin Type or Climate
Not all concealers work the same on all skin types or in all seasons. For example, what works well for you in winter may crack in summer, and if you have oily skin, you will need different formulas than for dry skin.
How to fix it?
- If you have dry or mature skin, look for hydrating, lightweight, and luminous concealers.
- If you have oily skin or areas where makeup moves, opt for more matte or long-lasting formulas.
- In winter, go for creamier textures.
- In summer, choose heat and sweat-resistant formulas.
Keep in mind that you can combine products: use a denser concealer only on the dark circle and a more fluid one to highlight.
Professional Tip
Let the concealer “dry” a bit before blending.
Yes, although it sounds strange, if you let it sit for 20 to 30 seconds before blending (especially high-coverage ones), it adheres better to the skin and maintains more coverage. Then, always blend with taps, never dragging.
Recommended Tools for Applying Concealer:
- Damp sponges (like beauty blenders): for a more natural and blended finish.
- Small brushes (like a flat brush or blending brushes): for precision and greater coverage.
- Your fingers: if you want warmth and a very integrated look, especially with fluid concealers.
Applying concealer well is a combination of good technique + the right product + prior preparation. You don’t need big tricks or to do your makeup like on Instagram: just understand what your skin needs and learn to work with it.
Recent Posts
Scroll up Scroll up Scroll up