
DIY Nail Stickers: A Step-by-Step Guide to Stunning Dry Marble Nails
Learn how to create stunning DIY nail stickers with this easy tutorial for Dry Marble Nails. Follow our step-by-step guide to achieve beautiful nail art at home.
Hello everyone!
Today, I’m excited to share a fresh take on Dry Marble Nails, this time featuring homemade nail stickers. Follow along as I guide you through the process in this quick tutorial. Let’s dive in!
What You'll Need: 1. A clear plastic sheet (I used a document sleeve, but a freezer bag works just as well) 2. Nail polishes of your choice (I opted for "52 Amazed by You" and "24 Indian Summer" from Essence, along with "C05 Meet Nudy" from Catrice) 3. Toothpick 4. Tweezers
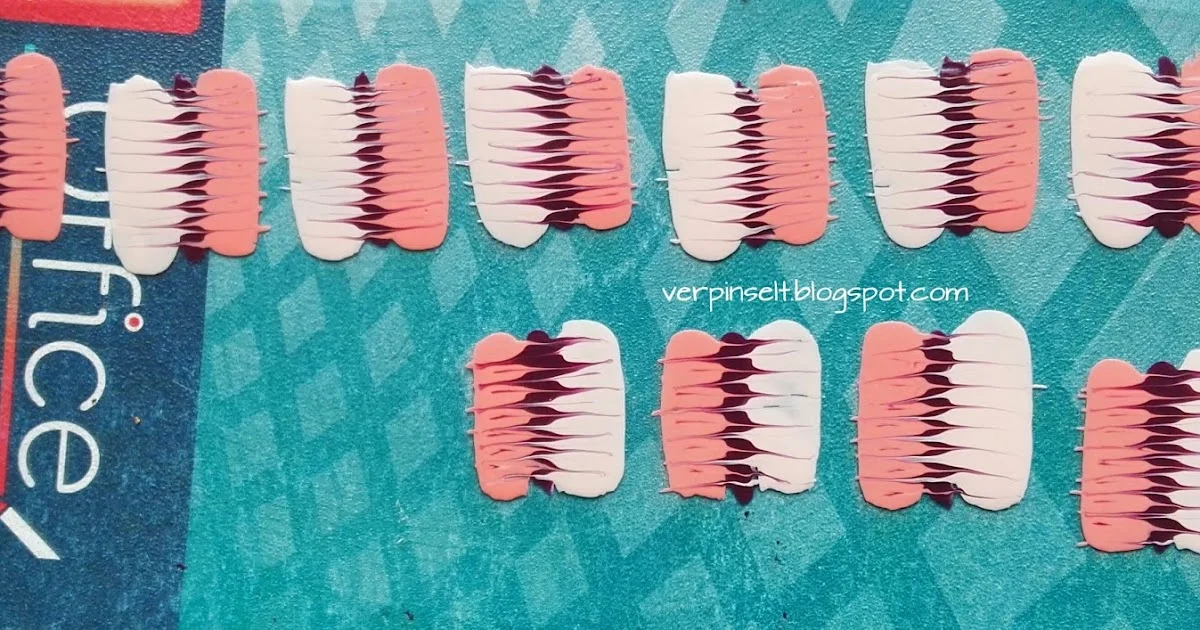
Instructions: 1. Start by taking your clear plastic sheet. 2. Apply your selected nail polish colors side by side (make sure not to apply them too thinly!). 3. Use a toothpick to draw zig-zag lines through the colors, creating a marbled effect. It should look something like this:

Once everything is thoroughly dried (preferably overnight), carefully peel the individual stickers off the plastic sheet using tweezers. Trim them to your desired size. To apply the stickers to your nails, paint a thin layer of nail polish (I used "C05 Meet Nudy") and let it dry slightly. Then, simply place the stickers on your nail, pressing down firmly and trimming any excess. For the edges, I found that a nail file works well at the tip, while a brush dipped in nail polish remover is effective for the sides. Finish off with a layer of top coat to seal everything in, and you’re done!
The result is quite impressive, if I do say so myself:

Here’s how the nail art looks in the sunlight:

And here’s a shot taken indoors by the window:

Finally, here are a couple more pictures taken outside in the shade:

I hope this little tutorial was easy to follow and that you enjoyed it. In my next post, I’ll be showcasing a nail art design created with one of my new MoYou stamping plates. Until next time, yours truly,
Carry