Easy Nail Art: 10 Designs for Beginners Without Stress
Discover how to create beautiful nail art easily at home with minimal supplies. This guide offers simple designs, essential techniques, and tips for beginners.
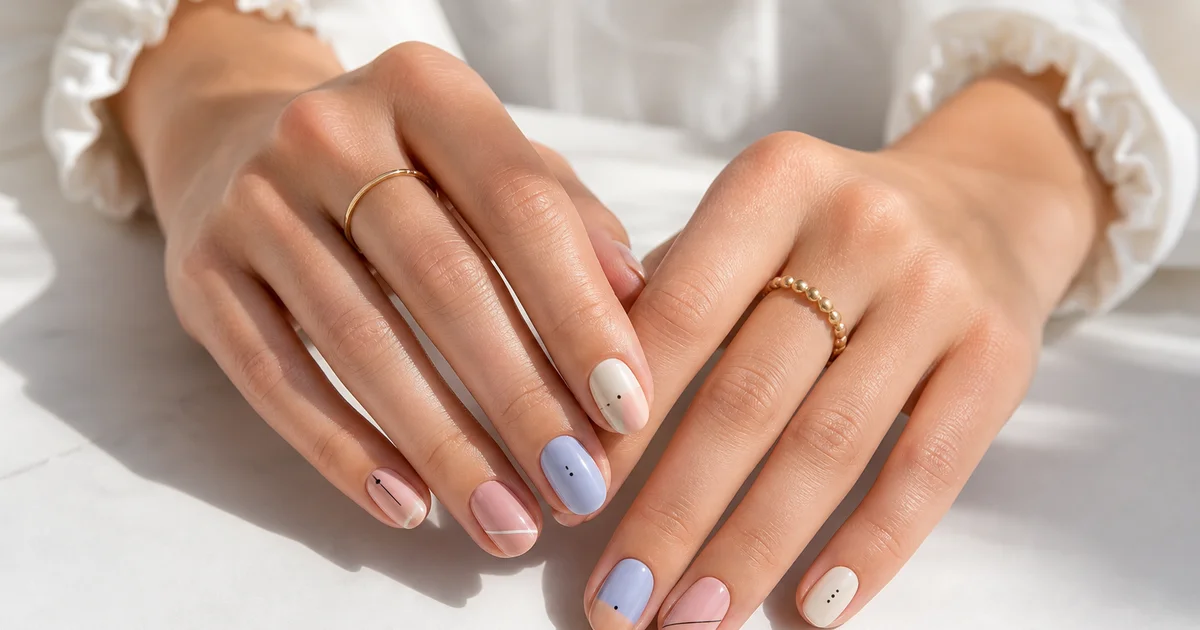
Are you eager to try out nail art but find it too complicated as a beginner? Good news: easy nail art is entirely achievable at home with minimal supplies. As a busy parent of three, I understand the struggle of finding time for salon visits, yet I manage to create beautiful nails in under 30 minutes. In this article, I’ll share the simplest designs to master, essential techniques, and the basic materials you truly need. No stress, just practical tips to make your nails look as gorgeous as those done by a professional.
⏱️ Short on Time?
Here are 5 essential points:
- The simplest designs include polka dots, fine French manicures, small hearts, and sponge gradients.
- You only need 3-4 nail polishes, a fine brush, and a sponge to get started.
- The fastest technique is the sponge gradient, taking a maximum of 5 minutes.
- Easy nail art works wonderfully on short nails with minimalist patterns.
- Common mistakes to avoid: applying too many layers of polish, rushing the process, and using poor-quality brushes.
What Basic Supplies Do You Need to Start Easy Nail Art?
You might be wondering: "Do I need to invest in a complete professional kit?" Absolutely not. You can start with basic supplies that cost next to nothing. I remember when I first tried, I was worried about spending a fortune. Spoiler alert: I was wrong.
Here’s what you really need for your first designs:
- A white or light beige polish (the essential base for almost all easy designs)
- One or two colored polishes (black, dark blue, soft pink, depending on your preference)
- A fine brush (a decent quality small round manicure brush, around 5-10 euros)
- A regular makeup sponge (you can cut a corner off one you already have)
- A base and top coat (these protect and add shine, which is important)
That’s seriously all you need. No UV lamp, no 50 different brushes, no 200-euro professional tools. Start with this, and you’ll see your progress in two weeks.
10 Easy Nail Art Designs for Beginners
Now, let’s talk designs. I’ve selected ten that I consider truly accessible, even if you’ve never done nail art before. I’ll rank them from the easiest to slightly more advanced, so you can progress at your own pace.
1. Polka Dots: The Timeless Classic
Why it’s easy: You only need a solid base and a fine brush (or even a pencil dipped in polish, honestly, that works). Polka dots are forgiving of minor imperfections because they are just circles. If one isn’t perfect, it goes unnoticed in the overall look.
How to do it: Apply two coats of light or white polish. With your brush dipped in black, blue, or pink polish, create small spaced dots on each nail. Let it dry for 10 minutes and apply a top coat. That’s it!
2. Revamped Ultra-Fine French Manicure
Forget about thick, clunky French manicures. The fine, minimalist version is trendy and super easy for beginners. The subtlety is what makes the design look sophisticated without effort.
How to do it: Start with a base of light or nude polish. Using a very fine brush, draw a tiny colored band (white, black, or even gold) along the free edge of the nail. It’s minimalist, chic, and clean. The secret: no perfection required, just lightness.
3. Sponge Gradient: Quick and Impressive
This is honestly my favorite technique because it yields a professional result in under 5 minutes. It’s the quickest and most forgiving technique for beginners. Even if you “mess up” the gradient, it still looks good.
How to do it: Apply two shades of polish side by side on a sponge (for example, light pink and dark pink). Dab lightly on each nail multiple times. The result is fuzzy, gradient, and super elegant. No one will notice the imperfections.
4. Minimalist Little Hearts
Hearts are cute and always surprise. On short nails, mini-hearts are perfect because they don’t take up much space.
How to do it: Using a fine brush on a neutral base, make two small dots that touch at the top (forming the V of the heart), then connect them at the bottom with a curve. A top coat, and it’s lovely. Try it first on one nail; it takes 30 seconds to learn.
5. Delicate Little Flowers
Micro-flowers are super trendy and much easier than one might think. No artistic precision required, I promise.
How to do it: Make five small dots of colored polish in a circle (or star shape, it doesn’t matter). In the center, place a lighter or darker dot. Voila, a flower. Repeat on two or three nails. It looks “oops, I didn’t mean to” and is adorable.
6. Simple Two-Color Geometric Nail Art
Two shades, basic shapes. It’s minimalist, easy, and modern. No artistic skills necessary.
How to do it: Divide your nail into two sections (half left/right or half top/bottom). Fill each side with a different color. Use fine tape to keep a clean line if desired. The result: a graphic and very easy design.
7. Gradient Glitter
Don’t worry, you don’t need to apply them one by one. The glitter gradient is done with a sponge just like the polish gradient.
How to do it: Apply top coat on the sponge (not regular polish), add glitter, and dab on your nails starting from the thumb. This creates an elegant progressive effect. Very easy, very beautiful.
8. Fine Straight Stripes
Simple stripes: a clear base, and you draw two or three fine lines with a brush on each nail. It’s geometric, minimalist, and chic.
How to do it: Simply draw your lines with a fine brush loaded with dark polish. They don’t need to be perfect: if you hesitate, a “wavy” line looks intentional and less rigid. I find it even cuter.
9. Free-Form Dots
A less orderly version of classic polka dots. You place small dots all over, confetti-style. This looks less “beginner” and more artistic.
How to do it: Same technique as the polka dots, but position them without following a strict pattern. Some big, some tiny, some touching. It’s organized chaos and it’s adorable.
10. Easy 3D Roses (the most accessible of 3D)
I know you think it’s professional and impossible. Well, the simplified version with gel or thick polish is totally doable for beginners. It’s my favorite challenge to propose.
How to do it: With a thick pink gel or polish, create a spiral on the nail without stopping. It’s like painting a rose from above. Three spirals per nail already look beautiful. No special technique required, just patience.
How to Adapt Easy Nail Art for Short Nails?
I understand that some of you have naturally short nails or prefer to keep them that way. Nail art on short nails is entirely possible and often more elegant than one might think. The trick is to focus on minimalism and designs that don’t require a large surface area.
Designs to favor on short nails: polka dots (few in number), ultra-fine French manicure, little hearts, micro-flowers, and two-color geometric designs. Avoid 3D roses with lots of spirals or overly busy designs: they require too much space.
My personal tip: on short nails, I like to apply a bold color on one or two accent nails and keep the other nails bare or with just a clear base. This creates the illusion of being “minimalist chic” rather than “she would have wanted more, but it’s short.” Marketing psychology applied to nails, haha.
Common Mistakes to Avoid When Starting Easy Nail Art
“The hardest part about nail art for beginners isn’t the technique, it’s the patience and quality of the materials.” — A piece of advice I wish I had received much earlier.
Here are the classic traps I fell into (and nearly everyone does) when I started:
- Applying too many layers of polish at once. Two coats max is plenty. Three or four layers make it thick, crack, and become a hassle. Be patient between applications.
- Using poor-quality brushes. A bad brush guarantees frustration. Invest 5-10 euros in a good little brush: it’s the difference between “I don’t like the result” and “this is great.”
- Trying to rush the process. Take your time. A dot that takes 2 seconds is already better than a dot that takes 0.5 seconds and has no shape.
- Skipping base and top coats. It’s easy to overlook this step, but it’s truly what makes your design last and shine. Honestly, it changes everything.
- Mixing too runny and too thick polishes. If your polish is too runny, it runs everywhere. If it’s too thick, you can’t create details. Stick to “normal” polishes when starting out.
- Comparing your beginner results to professionals on YouTube. Those girls have years of practice and professional materials. Be kind to yourself.
The Fastest Easy Nail Art Technique for Busy Mornings
Spoiler alert: the sponge gradient is the quickest and most forgiving technique for stunning results in under 5 minutes (not including drying time). It’s my secret for those mornings when I have three kids calling me.
Why is it quick? Because you don’t need precision: you dab, that’s it. No fine brush required, no surgical hand needed, no counting dots or petals. It’s incredibly forgiving, and the result always looks more advanced than it actually is.
Another quick technique that saves me: scattered dots and stripes. Again, no perfection required, and it takes just 10-12 minutes. I do this during my commute after meetings.
Easy Nail Art Without Professional Supplies: Is It Really Possible?
Yes, absolutely. You don’t need professional materials for quality easy nail art. I’m saying this without selling a dream: I’ve created beautiful designs using only what I had at home.
Here’s what you can use instead of “pro” materials:
- A very fine makeup brush (sometimes even better than a nail art brush)
- A piece of sponge cut from an old makeup sponge
- Fine tape instead of nail tape
- A pencil or toothpick for detailed work
- A regular top coat instead of a professional one
With these tips and designs, you can confidently dive into the world of nail art, making it a fun and enjoyable experience. Happy painting!